You’ve found a contractor that you’re happy with, you’ve chosen your shingle colors, and you’ve signed your permit documents – now what?
When getting your roof replaced, there are a few key things you should know to prepare. Roofing is a destructive process that can be noisy during installation but it is typically wrapped up in a day (or sometimes two!) so you can get back to normal with your home protected from those afternoon showers that happen in Florida.
Here are a few key things that happen during your installation…
1. Crew Arrival and Prep
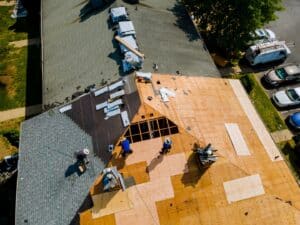
Roofing crews typically arrive early in the morning to get started with a dumpster. Our crews start getting set up at 7AM, which gives them enough time to knock the installation out in one day, and avoid some of the summer heat. The crew will begin covering any landscaping with tarps to prevent damage and debris falling into it. Once the ground is prepped, the crew begins tearing off shingles.
2. Roofing Removal
This is where the noise starts. The crew will being removing shingles, underlayment, and all other items being disposed of. This is where rotten wood is discovered if you’ve had any active leaks or your existing roof was damaged.
3. Replacement Wood, Nailing, Underlayment, Drip Edge, and Shingles
If any wood needs replaced, this is when it will happen. After replacing wood, the crew will being nailing the decking (plywood) up to current building codes. In Jacksonville, all nails should be placed no more than 4-6 inches apart. Underlayment, which serves as the waterproof barrier between the decking and the shingles, is installed next. Florida Building Code requires two layers of underlayment for most roofs to provide a secondary water barrier. After underlayment, drip edge is installed before finally installing shingles.
4. Inspection
Most counties, like Duval County and Nassau County, require a mid-inspection for your roof which is requested by your licensed roofing contractor when they file for your permit. While the type of inspection is different from county to county – almost all require evidence that the roof was installed properly.
5. Clean Up
After completion of installing the roofing system, the crew will clean up any remaining debris. It’s important to remove all tarps, debris, and trash then sweep for nails. Since roofing is such a destructive process, nails can often get struck in grass, gravel, or your driveway.
6. Final Walk Through
Your licensed roofing contractor should perform a final walk through with you to ensure nothing looks out of place and all debris is removed.
7. Final Inspection
Once all roofing work is completed, the jurisdiction where your permit was pulled will come out to perform a final inspection. This typically happens 1-3 days after your roof is completed.
8. Completion Documents
Once you’ve paid your balance and the final inspections are completed, you will receive your completion documents from your roofing contractor. This typically includes a finalized permit or certificate of completion, paid invoice, and a warranty if your contractor is registered with the shingle manufacturer.
Questions? Contact Us!
We’re proud to be your neighborhood roofer! Call Advocate Roofing and Restoration at (904) 707-6456 with any questions!


